ComfyUI Manager 安装教程:插件管理器配置与常见问题
ComfyUI Manager 插件管理器安装教程,包含 Git 准备、custom_nodes 放置、启动验证、节点搜索安装和更新失败时的排查方法。
你会得到什么
照着本文做完,你应该能:
- 把 Manager 安装到正确目录。
- 重启后在右侧看到 Manager 按钮。
- 打开 Manager 面板并执行 Fetch Updates。
- 用 Install Missing Custom Nodes 修复别人工作流里的缺失节点。
- 知道 Manager 装坏时该看控制台还是目录结构。
先看结论
ComfyUI Manager 必须安装到 ComfyUI/custom_nodes/ComfyUI-Manager。Windows 便携版和 Linux 源码版命令不同,但判断标准一样:重启后页面里出现 Manager,控制台没有 ComfyUI-Manager import failed,并且你能点开 Fetch Updates。

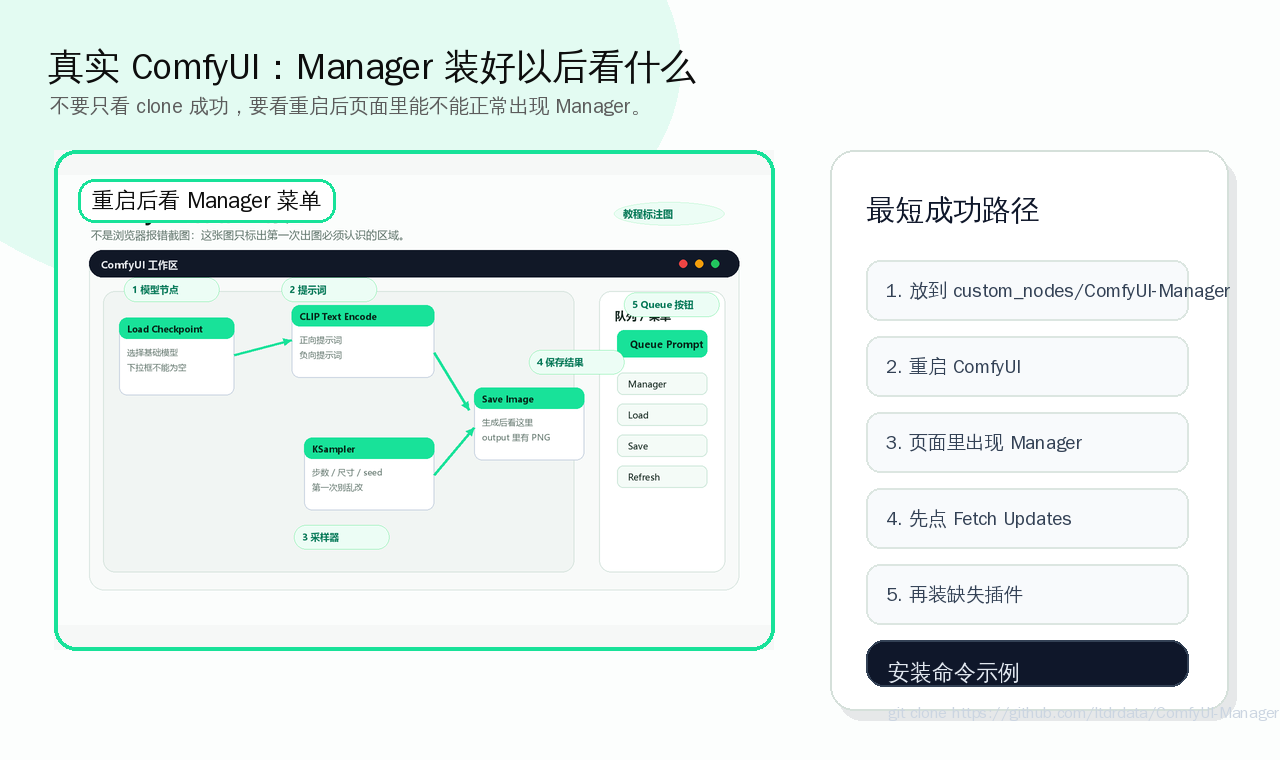
最短安装路径
如果你现在只想先装成功,按这个顺序做:
- 先确认
git --version能跑。 - 把仓库放到
ComfyUI/custom_nodes/ComfyUI-Manager。 - 重启 ComfyUI,不要只刷新浏览器。
- 页面里出现 Manager 后先点
Fetch Updates。 - 再去装别的节点或修红色节点。
安装前检查
你需要先确认三件事:
- ComfyUI 能正常启动。
- 已经安装 Git。
- 找得到
custom_nodes目录。
Git 检查命令:
Windows cmd:
git --versionLinux:
git --version如果命令不存在,Windows 先看 /guides/git-not-recognized/,Linux 用:
sudo apt update
sudo apt install -y git
Manager 安装失败最常见原因就是目录放错。正确位置是 ComfyUI/custom_nodes/ComfyUI-Manager,不是 ComfyUI 根目录,也不是多套一层 ComfyUI-Manager-main/ComfyUI-Manager-main。
Windows Portable 安装方法
假设你的目录是:
D:\AI\ComfyUI_windows_portable\ComfyUI\打开 cmd:
D:
cd D:\AI\ComfyUI_windows_portable\ComfyUI\custom_nodes
git clone https://github.com/ltdrdata/ComfyUI-Manager.git
完成后应该得到:
D:\AI\ComfyUI_windows_portable\ComfyUI\custom_nodes\ComfyUI-Manager\里面应该有 __init__.py、requirements.txt 等文件。
然后关闭 ComfyUI 黑色窗口,重新双击 run_nvidia_gpu.bat。
Linux 安装方法
假设 ComfyUI 在:
~/ai/ComfyUI执行:
cd ~/ai/ComfyUI/custom_nodes
git clone https://github.com/ltdrdata/ComfyUI-Manager.git
cd ~/ai/ComfyUI
source .venv/bin/activate
python main.py --port 8188
如果你不是用 .venv,就进入自己实际使用的 Python 环境。
如果需要安装依赖
大多数情况下重启会自动处理或直接可用。如果控制台提示缺依赖,可以手动安装:
Windows Portable:
cd /d D:\AI\ComfyUI_windows_portable
python_embeded\python.exe -m pip install -r ComfyUI\custom_nodes\ComfyUI-Manager\requirements.txt
Linux:
cd ~/ai/ComfyUI
source .venv/bin/activate
pip install -r custom_nodes/ComfyUI-Manager/requirements.txt
装完必须重启 ComfyUI。
页面里怎么确认 Manager 装好了
打开 http://127.0.0.1:8188,看右侧菜单是否出现:
Manager点击后能看到:
- Install Custom Nodes
- Install Missing Custom Nodes
- Update All
- Fetch Updates
- Custom Nodes Manager
如果没有按钮,回到控制台找 Manager 相关报错。
最容易踩的坑
错误 1:放到根目录
ComfyUI\ComfyUI-Manager\正确:
ComfyUI\custom_nodes\ComfyUI-Manager\错误 2:zip 多套一层
custom_nodes\ComfyUI-Manager-main\ComfyUI-Manager-main\__init__.py正确:
custom_nodes\ComfyUI-Manager\__init__.py错误 3:clone 中断,目录不完整
表现:目录存在,但文件很少。处理:删除目录重新 clone。
网络失败怎么办
如果 git clone 很慢或失败:
- 换网络或代理。
- 从 GitHub 页面下载 zip。
- 解压后把目录改名为
ComfyUI-Manager。 - 放到
custom_nodes。 - 确认
custom_nodes/ComfyUI-Manager/__init__.py存在。
不要把 zip 文件直接丢进 custom_nodes,必须解压。
安装后第一件事
打开 Manager,先执行:
Fetch Updates然后再搜索插件。这样 Manager 的节点数据库比较新,修复缺失节点时更准确。
最有价值的用法:修复缺失节点
当你导入别人工作流后看到红色节点,不要先手动猜插件名。优先使用:
Manager → Install Missing Custom Nodes推荐流程:
- 导入工作流。
- 如果出现红色节点,打开 Manager。
- 点击
Install Missing Custom Nodes。 - 勾选识别出来的插件。
- 安装完成后重启 ComfyUI。
- 重新打开工作流,确认红色节点消失。
注意:Manager 只能帮你安装自定义节点,不能自动下载所有 Checkpoint、LoRA、ControlNet 模型。模型缺失仍然要按模型路径教程手动放置。
怎么确认已经成功
custom_nodes/ComfyUI-Manager/__init__.py存在。- 重启 ComfyUI 后控制台没有 Manager import failed。
- WebUI 右侧出现 Manager 按钮。
- Manager 面板能打开并显示安装功能。
下一步读什么
- 学会使用 Manager:
/guides/manager-usage/ - 导入别人工作流:
/guides/import-workflow/ - 缺失节点排查:
/guides/custom-nodes-import-failed/ - 继续新手路线:
/topics/comfyui-beginner/
读完这篇后,回到主路线继续推进
如果这篇只解决了一个局部问题,优先按当前状态回到新手、模型、显存或工作流导入路线,避免读完后断线。